Survival Knot Series – Part 3 The Bowline
I get commissions for purchases made through links in this post. View our Affiliate Disclaimer.
Welcome to part 3 of our Survival Knot series. We are going to cover the bowline and running bowline knots in this article. These knots are widely used and should be a part of your knot knowledge for camping and survival.
Bowline Survival Knot
The bowline is one of the most useful survival knots to learn. It forms a secure loop that won’t jam and is both easy to tie and untie. The purpose of the bowline is mostly for forming a fixed loop, of varying sizes, at the end of a line. This knot has been used for many years, particularly in nautical environments to secure sails in a forward position, hence the name bow line. This is a tried and tested survival knot that is both reliable and strong.
The bowline survival knot is easy to untie, even after severe tension is applied it. This feature of the knot, however, makes it unsuitable for securing yourself in a life or death situation such as mountain climbing.
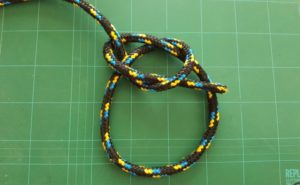
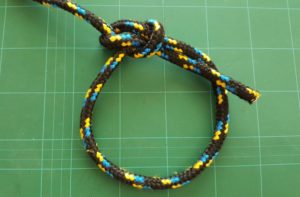
To tie the knot, first of all, lay the rope across your left hand with the free end hanging down. The next step is to form a small loop in the line in your hand. Bring the free end up and pass through the eye from the underside (back) of the loop. Next, wrap the line around the standing line and back down through the loop (around the tree and back down the hole). Lastly, tighten the knot by pulling on free end while holding standing line.
Watch the video below to see how it is done.
Running Bowline Survival Knot
This variation of the bowline knot is most commonly used to tie a noose or sliding loop. You can use the running bowline for retrieving objects by throwing the open loop around them. The loop will tighten down on the object, as the standing line is pulled tight.
This knot does not bind against the standing line and can be easily undone, even after a lot of tension has been put on the standing line.
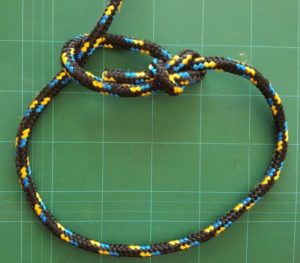
First of all, double the end of a rope and wrap the tail end over then under the standing line and up to the side of new loop created. Make a small loop on the topside of the original loop by twisting the line over itself. Feed the tail end through the small loop. Next, wrap the tail end once around topside of large loop and back down through small loop. Lastly, pull tag end tight creating fixed loop that the standing line can slip through.
Take a look at our other posts on Survival Knots – Part 1 and Part 2.
Get more posts like this
Subscribe to our mailing list and get interesting homesteading and green living info and updates to your email inbox.
Thank you for subscribing.
Something went wrong.

