Growing Radishes At Home: Step-by-Step Guide to Grow It Yourself
I get commissions for purchases made through links in this post. View our Affiliate Disclaimer.
If you’re considering growing radishes at home, you’re in for a straightforward yet rewarding experience. You’ll need to start by selecting the right variety and preparing your soil correctly. With just a bit of attention to detail, you can enjoy fresh radishes right from your garden.
But before you plant those seeds, there are some essential steps to secure your success. What do you need to know about soil preparation and seed selection to guarantee a bountiful harvest?
Key Takeaways
- Choose a radish variety suited to your climate, ensuring well-drained soil and at least six hours of sunlight daily for optimal growth.
- Sow seeds 5 cm apart and 1 cm deep; cover lightly with soil and maintain consistent moisture during germination to encourage healthy growth.
- Thin seedlings to prevent overcrowding, maintaining 2.5 cm for small varieties and 10-15 cm for larger radishes when they reach 2-3 inches tall.
- Water consistently, aiming for 4-5 times a week, ensuring balanced moisture to prevent root rot and promote robust development.
- Harvest radishes when they reach about 2.5 cm in diameter, storing them in breathable bags in the fridge for maximum freshness.
Understanding Radishes
When growing radishes, it’s important to understand the different types available and their nutritional benefits.
You can choose from salad radishes, winter radishes, and even edible-podded varieties, each offering unique flavors and uses in your kitchen.
Packed with vitamins and minerals, radishes can boost your diet while adding a crisp texture to salads and dishes, making them a fantastic addition to your home garden.
Types of Radishes
Radishes come in a variety of types, each bringing unique flavors and textures to your garden and plate. Understanding these radish varieties can help you choose the best options for your culinary needs.
Spring radishes, like ‘Cherry Belle’ and ‘French Breakfast,’ are popular for their quick growth and crisp texture. They’re usually small, round, and have vibrant radish colors such as red and pink. These varieties are perfect for salads and garnishes.
On the other hand, winter radishes, including ‘Daikon’ and ‘Black Spanish,’ offer a different experience. They tend to be larger and can grow longer roots with a milder flavor.
These radishes are often used in cooking, making them versatile for various dishes. The colors of winter radishes range from white to black, showcasing their unique characteristics.
Nutritional Benefits
Packed with nutrients, radishes are a fantastic addition to your diet. These vibrant vegetables offer numerous health benefits that can support your overall well-being. One of their standout features is their rich vitamin content, particularly vitamin C. Just a small serving can provide you with a significant portion of your daily requirement, helping to boost your immune system and promote healthy skin.
Radishes are low in calories, making them an excellent choice for those looking to maintain or lose weight. Their high fiber content aids digestion, ensuring your body processes food efficiently. This fiber also contributes to a feeling of fullness, which can prevent overeating.
These root vegetables contain antioxidants, which help combat oxidative stress in your body, reducing the risk of chronic diseases. The natural compounds in radishes can also support liver health and improve detoxification processes.
Incorporating radishes into your meals is easy and versatile. Whether you enjoy them raw in salads, roasted, or pickled, you can reap the nutritional rewards.
Preparing To Plant Radishes
Before you plant radishes, it’s important to choose the right variety for your space and preferences. You should also select an ideal location with good sunlight and well-drained soil to encourage healthy growth.
Finally, prepare the soil by loosening it and enriching it with organic matter, which will provide essential nutrients for your radishes.
Choosing the Right Variety
Which radish variety will suit your garden best? When choosing, consider climate considerations and soil types. For cooler climates, salad radishes thrive, growing quickly and providing a revitalizing crunch. If you have warmer conditions, winter radishes or oriental varieties, like daikon, can perform well, developing larger roots over a longer growing season.
Salad radishes are perfect for early spring and late summer planting, as they mature in just four weeks. In contrast, winter radishes require a bit more time, making them ideal for late summer sowing.
If you’re looking for something unique, edible-podded radishes add a spicy twist to your meals, flourishing in hotter weather.
Soil type also plays an essential role. Radishes prefer well-drained soil that’s rich in organic matter. If your soil is heavy or clay-like, consider raised beds to improve drainage and root development.
Testing your soil’s pH can help guarantee it’s suitable, aiming for a range between 6 to 7 for peak growth. By carefully selecting the right variety based on your climate and soil, you’ll set the stage for a successful radish harvest.
Selecting the Ideal Location
Selecting the ideal location for planting radishes is vital to their success. To thrive, radishes need plenty of sunlight exposure. Aim for a spot that receives at least six hours of direct sunlight each day. This bright light encourages healthy growth and enhances the flavor of your radishes.
Additionally, consider soil drainage as a significant factor in your location choice. Radishes prefer well-drained soil to prevent waterlogging, which can lead to diseases and poor root development. If you’re using containers or raised beds, make sure they’ve drainage holes and fill them with a mix of compost and soil that promotes good drainage.
Avoid growing radishes at your home in areas where water tends to pool after heavy rains, as this can hinder your radishes’ growth. If you’re gardening in a small space or on a balcony, remember that radishes can thrive in pots, provided they receive adequate sunlight and drainage.
Soil Preparation
Preparing the soil is vital for growing radishes that are healthy and nutritious. Start by testing your soil pH, aiming for a range between 6.0 and 7.0, which is ideal for radishes. If your soil is too acidic or alkaline, you can adjust it by adding lime or sulfur, respectively. This will create a welcoming environment for your seeds, allowing them to flourish.
Next, incorporate plenty of organic matter into your soil. This can include well-rotted manure, compost, or leaf mold. Organic matter not only improves soil fertility, but it also enhances drainage and moisture retention, both essential for radish growth.
Loosen the soil to at least six inches deep, breaking up any clumps. This helps create a loose texture, allowing the radishes to develop properly.
Once your soil is prepared, make sure it’s well-aerated and free from weeds. Weeds can compete for nutrients and water, hindering your radishes’ growth.
Taking these steps will set a solid foundation for your radish garden, empowering you to enjoy a bountiful harvest in no time.
Planting Your Radishes
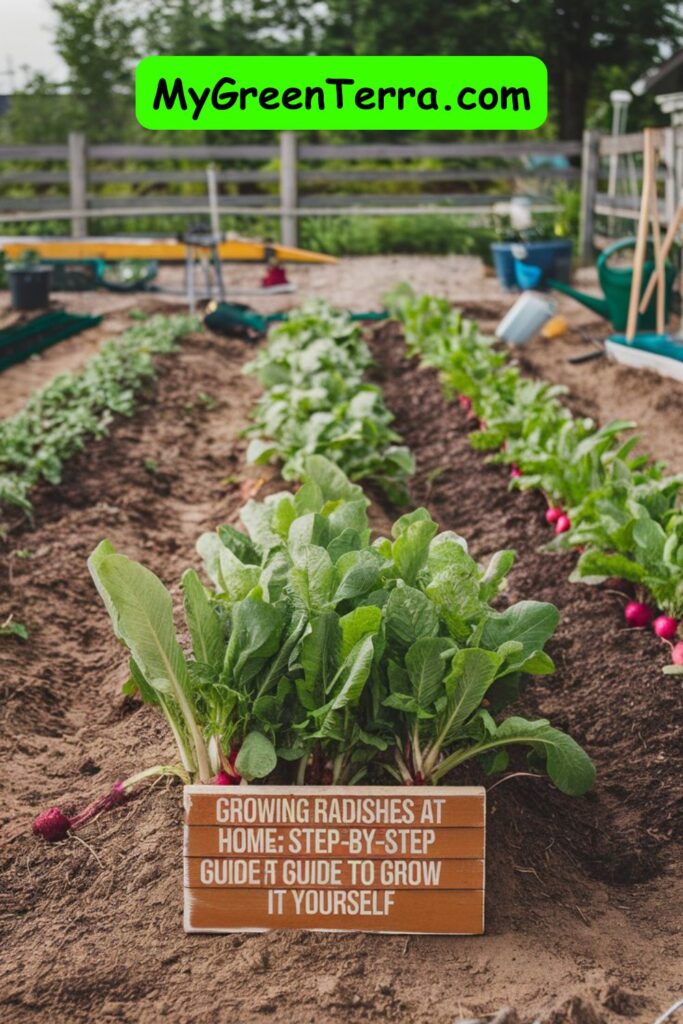
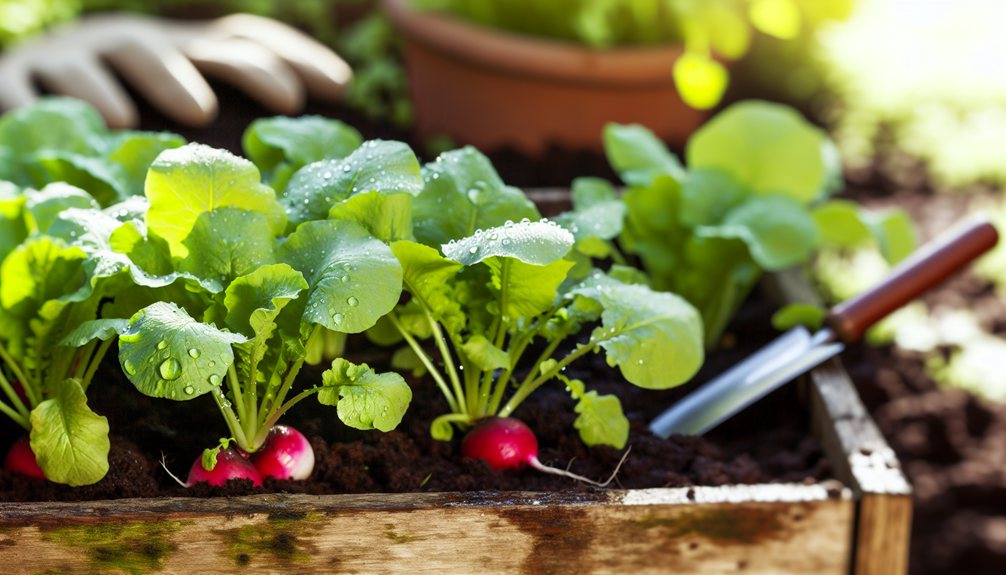
Now that you’re ready to plant, it’s time to focus on sowing your radish seeds. Space the seeds about 5cm apart and plant them about 1cm deep for ideal growth.
Additionally, consider companion planting to enhance their growth; radishes pair well with crops like lettuce and cucumbers, helping to maximize your garden’s potential.
Sowing Seeds
To successfully sow your radish seeds, start by poking holes in the compost about 5cm apart, making sure each hole is around 1cm deep. This careful seed depth helps guarantee good germination and robust growth.
Place one radish seed in each hole, then cover the seeds with a handful of soil. This placement is essential for proper seed spacing, allowing each plant enough room to thrive.
As you begin this liberating gardening journey, consider these points to enhance your experience:
- Enjoy the satisfaction of home-grown produce.
- Feel the connection to nature as you nurture your seeds.
- Embrace the joy of watching your efforts turn into vibrant radishes.
- Relish the anticipation of fresh, crisp flavors in your meals.
- Celebrate the simplicity and ease of growing your own food.
Companion Planting With Radishes
Companion planting can greatly enhance your radish growth and overall garden health. By pairing radishes with beneficial companions like lettuce and peas, you can improve yields and deter pests. These plants help each other thrive, creating a harmonious garden environment.
Here’s a quick reference table to guide your planting decisions:
| Beneficial Companions | Plants to Avoid | Benefits |
|---|---|---|
| Lettuce | Hyssop | Shade and moisture retention |
| Peas | Mustard | Nitrogen fixation for soil health |
| Spinach | Radish (larger types) | Companion growth and pest control |
| Carrots | Other Brassicas | Prevents overcrowding |
When planning your garden, keep in mind the plants to avoid. Some plants can compete for nutrients or attract pests that harm radishes. By choosing the right companions, you’ll cultivate a thriving garden, ensuring your radishes grow strong and healthy. Embrace the power of companion planting, and watch your radish harvest flourish!
Caring for Radish Plants
Caring for your radish plants involves a few key practices to guarantee a healthy harvest.
You’ll have to water them consistently, thin out overcrowded seedlings for better growth, and apply fertilizer as necessary to boost their nutrition.
Additionally, keeping an eye out for pests and diseases will help you maintain strong, productive plants.
Watering Practices
While maintaining consistent soil moisture is essential for radish growth, it’s equally important to avoid overwatering. Overwatering can lead to root rot and other issues that hinder your radishes’ development. You want to achieve a balance that promotes healthy growth.
Using methods like drip irrigation can help you control the amount of water your plants receive. This technique allows for efficient moisture retention in the soil, ensuring that your radishes thrive without drowning. Aim to water your radishes lightly but frequently, about 4 to 5 times a week, adjusting based on the weather.
Here are some key points to remember about watering your radishes:
- Water early in the morning or late in the evening to reduce evaporation.
- Check soil moisture by sticking your finger about an inch deep; if it feels dry, it’s time to water.
- Avoid watering directly on the leaves to prevent fungal diseases.
- Use mulch to help retain moisture and suppress weeds.
- Pay attention to changes in weather; adjust your watering schedule accordingly.
Thinning Seedlings
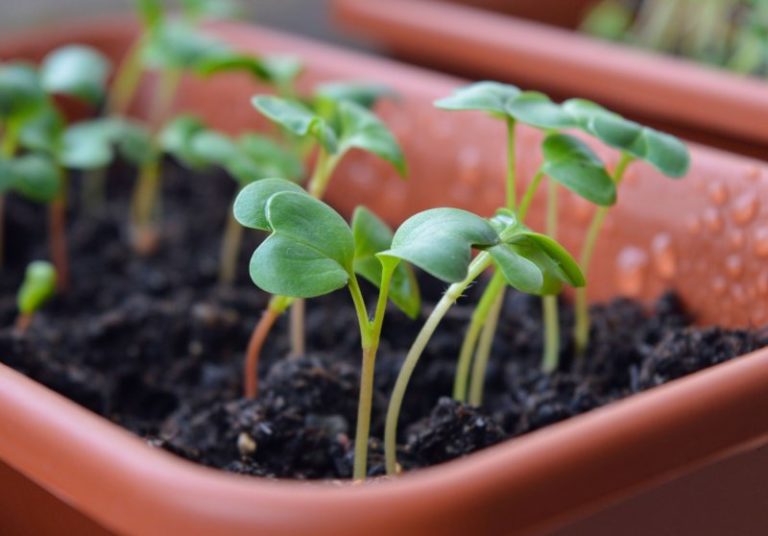
After ensuring your radishes receive consistent moisture, the next step in caring for your plants is thinning the seedlings. Thinning is essential for preventing overcrowding, which can hinder root development and lead to stunted growth. To achieve this, use effective thinning techniques that allow each plant enough space to thrive.
Start by evaluating the density of your seedlings. Ideally, you should maintain seed spacing of about 2.5 cm (1 inch) for smaller varieties and 10-15 cm (4-6 inches) for larger ones like daikon. Carefully remove the weaker seedlings, ensuring you don’t disturb the roots of the remaining plants.
It’s best to do this when the seedlings are about 2-3 inches tall, as they’ll be stronger and easier to manage. Thinning not only promotes healthier plants, but it also encourages better airflow and sunlight penetration, reducing the risk of disease.
Fertilization
To guarantee your radishes grow strong and healthy, proper fertilization is key. Radishes thrive best when they receive a balanced mix of nutrients.
Using organic fertilizers enhances soil health and promotes nutrient balance, ensuring your plants flourish without harmful chemicals.
Here are some essential tips for fertilizing your radish plants:
- Choose organic fertilizers like compost or well-rotted manure.
- Apply fertilizer before planting to enrich the soil.
- Follow the recommended amount; too much can harm your plants.
- Fertilize again when the plants are about halfway to maturity.
- Regularly monitor soil health to maintain ideal conditions.
Pest and Disease Management
Managing pests and diseases is vital for keeping your radish plants healthy and productive. To maintain a thriving garden, you will have to focus on pest identification and control. Common pests include flea beetles and root maggots. These can be detrimental to your radishes if not addressed promptly.
Using organic pesticides can help you combat these pests without harming the environment. Regular monitoring of your plants is important, as early detection makes management easier.
Here’s a quick reference table for common pests and their management strategies:
| Pest | Identification | Control Method |
|---|---|---|
| Flea Beetles | Small holes in leaves | Neem oil or diatomaceous earth |
| Root Maggots | Wilting plants, stunted growth | Crop rotation, beneficial nematodes |
| Cabbage Maggots | Tunneling in roots | Organic insecticides, traps |
Remember to practice good garden hygiene, like removing debris and weeds, to prevent pest habitats. If you notice any diseases, such as leaf spots or root rot, act quickly with proper organic treatments. By staying vigilant, you will enjoy a bountiful radish harvest.
Harvesting and Storage
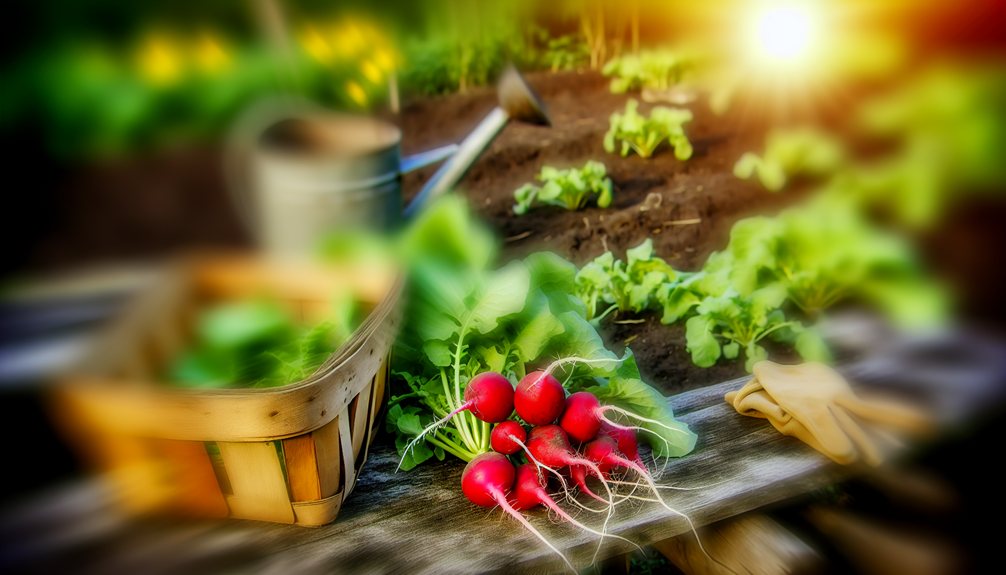
Knowing when to harvest your radishes is key to enjoying their crisp flavor. You should check their size regularly, as salad radishes are best picked when they’re about 2.5 cm in diameter.
Once harvested, proper storage techniques will help keep them fresh and tasty for your meals.
Determining Harvest Readiness
As you watch your radishes grow, you may wish to keep an eye on specific signs that indicate they’re ready for harvest.
The timing for harvesting is essential, as waiting too long can lead to bitter or woody roots. Here are some visual cues to help you determine if your radishes are ready:
- Size: Look for radishes that have reached about 2.5 cm (1 inch) in diameter.
- Color: A vibrant color indicates a healthy, ripe radish.
- Leaves: If the leaves start to yellow, it’s a sign that the roots are maturing.
- Popping Up: You’ll notice some radishes pushing themselves above the soil; this is a good indicator of readiness.
- Timing: Most varieties are ready for harvest in about 4 weeks after planting.
Harvesting Techniques
When you’re ready to harvest your radishes, it’s essential to use the right techniques to avoid damaging the plants. Start by gently loosening the soil around the radishes with a hand trowel or your fingers. This helps to release the roots without unnecessary force.
Depending on the variety, you should harvest salad radishes about four weeks after planting, when they reach about 2.5 cm (1 inch) in diameter. For winter radishes, you can leave them in the ground longer, allowing them to mature fully.
When pulling radishes, grasp the base of the greens, not the stem, to prevent tearing. Tug gently but firmly, making sure the roots come out intact. Be mindful of surrounding plants, too, as you want to maintain healthy spacing for future growth.
Incorporating good plant care practices during the growing phase can lead to a better harvest. Use proper watering and spacing techniques to guarantee your radishes develop effectively.
Storage Tips
To keep your radishes fresh after harvesting, it’s crucial to store them properly. Using the right storage methods guarantees they’ll stay crisp and flavorful for longer.
Here are some freshness tips to help you enjoy your radishes at their best:
- Remove the leaves to prevent moisture loss.
- Store radishes in a breathable bag, like a paper or cloth bag.
- Keep them in the vegetable crisper drawer of your fridge.
- Sprinkle a bit of water on the radishes before sealing them in the bag to maintain humidity.
- Use them within a week for peak freshness.
Culinary Uses
Radishes offer a range of culinary uses, making them a versatile addition to your kitchen.
You can enjoy them raw in salads or as a crunchy snack, enhancing dishes with their crisp texture and peppery flavor.
Alternatively, cooking radishes can soften their bite and bring out a milder taste, perfect for stir-fries and roasted vegetable medleys.
Raw Applications
Although often overlooked, fresh radishes can enhance your salads and garnishes with their vibrant colors and crisp textures. These crunchy gems not only add visual appeal but also offer an invigorating peppery flavor that can uplift any dish. Using radishes in your meals can be a delightful adventure in flavor and creativity.
Consider these exciting ways to incorporate raw radish into your culinary repertoire:
- Create colorful raw radish salads for an invigorating side.
- Use thinly sliced radishes to add crunch to sandwiches and wraps.
- Garnish soups or tacos with diced radishes for a zesty kick.
- Mix radish slices into a vegetable platter for a vibrant display.
- Top your favorite grain bowls with shredded radish for added texture.
Raw radish salads are a simple yet effective way to enjoy this nutritious vegetable. Combine them with leafy greens, citrus fruits, or other colorful vegetables for a healthful mix.
Radish garnishes can give your dishes a gourmet touch, making even the simplest meals feel special. Embrace the liberation of home-grown produce, and enjoy the freshness of radishes straight from your garden!
Cooked Dishes
Exploring the culinary potential of radishes doesn’t stop at fresh applications; these versatile vegetables shine when cooked as well. One popular method is roasting radishes, which transforms their flavor from sharp and peppery to subtly sweet and tender. Simply toss your radishes in olive oil, season with salt and pepper, and roast them in the oven until they’re golden brown. This not only enhances their taste but also brings out their natural sweetness.
Another great way to enjoy cooked radishes is by sautéing them. Heat some butter or oil in a pan, add sliced radishes, and cook them until they’re just tender. This quick technique preserves their crunch while mellowing their bite.
Additionally, cooked radishes can be a delightful addition to various dishes. Consider adding them to stir-fries, soups, or even grain bowls. You can also use radishes in warm salads, combining them with greens or grains for a balanced meal.
Their unique flavor profile complements many ingredients, making them a liberating choice for your culinary explorations. So, don’t hesitate to experiment and discover how cooked radishes can enhance your meals beyond the classic radish salads.
Troubleshooting Common Issues

When growing radishes, you might encounter a few common issues, like spicy or woody roots and poor germination rates.
These problems often stem from inconsistent watering, overcrowding, or planting at the wrong time.
Spicy or Woody Radishes
If you notice your radishes turning out spicy or woody, it’s often a sign of stress during their growth. This can stem from various factors, including temperature extremes, inconsistent watering, or overcrowding.
To avoid these issues and guarantee a better harvest, consider the following:
- Monitor soil moisture; both drought and overwatering can lead to poor flavor.
- Space your radish seeds properly to allow for adequate growth and air circulation.
- Maintain a consistent temperature; radishes thrive in cooler conditions.
- Harvest your spicy varieties promptly; waiting too long can lead to a woody texture.
- Consider the time of year; planting in the right season is essential for quality.
Poor Germination Rates
Poor germination rates can be frustrating, especially after putting in the effort to plant your radish seeds. Several germination factors can affect your success, including seed quality, soil conditions, and moisture levels. If you’re facing poor germination, it’s crucial to troubleshoot the issue.
Here’s a quick reference table to help you identify potential problems:
| Problem | Possible Cause | Solution |
|---|---|---|
| Seeds not sprouting | Low seed quality | Use fresh, high-quality seeds |
| Uneven germination | Inconsistent watering | Maintain even moisture |
| Slow germination | Poor soil conditions | Improve drainage and fertility |
| Seeds rotting | Overwatering | Water less frequently |
| Seeds washed away | Heavy rain or flooding | Use mulch to retain moisture |
Take time to evaluate these factors. Confirm you’re using quality seeds, as inferior ones can lead to poor results. Monitor your watering to avoid saturation. Finally, prepare your soil well, confirming it’s loose and rich in nutrients. By addressing these issues, you’ll boost your chances of a thriving radish garden, bringing satisfaction to your home gardening efforts.
Conclusion
Growing radishes at home is a straightforward and satisfying endeavor. By following the steps outlined in this guide, you can cultivate healthy radishes that add flavor to your meals. From preparing the soil to harvesting, each stage is essential for success. Remember to monitor your plants for any issues and adjust your care as needed. With a little attention, you’ll enjoy fresh, crisp radishes right from your garden, enhancing your culinary creations and your gardening skills.
Get more posts like this
Subscribe to our mailing list and get interesting homesteading and green living info and updates to your email inbox.
Thank you for subscribing.
Something went wrong.

