How To Make Kefir Cream Cheese
I get commissions for purchases made through links in this post. View our Affiliate Disclaimer.
Making kefir cream cheese is dead easy! I have laid out the process is a few easy, simple to follow steps to help you produce your own versatile, healthier, pro-biotic cream cheese.
What You Will Need
The equipment you need to make kefir cream cheese is usually readily available in most households, and even if you have to buy a few of the items, they are not pricey.
- A fair sized plastic container with a lid – I use an old biscuit container that is 18cm tall and has a diameter of 23cm (see fig 1.)
- A piece of mutton cloth / cheese cloth big enough to cover the top of your container.
- 2 large elastic bands to secure the mutton cloth in place
- 3 or 4 clothes pegs

The Container
Step 1 Prepare Equipment
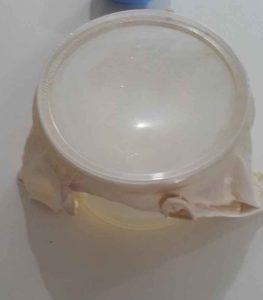
Make sure your container is clean. Cover the container with the mutton cloth. Make sure it is not too tight – it should form a shallow hollow in the container. Secure the cloth in place with the 2 elastic bands.

Step 2 Secure Mutton Cloth
Use the clothes pegs as an additional measure to secure the cloth in place for the next step – this is just for a matter of convenience to make sure the elastic bands do not slip off when you add the weight of the kefir.

Step 3 Pour Kefir Into Cloth
Slowly pour the kefir into the centre of the cloth, to within about half to 1cm of the rim of the container.

Step 4 Secure Lid And Refrigerate

Carefully remove the clothes pegs. Place the lid on top of the container, and depending on your type of container, secure it in place.
Fold the edges of the cloth over the top of the lid and secure in the centre with a clothes peg. This is not essential, but will help limit the amount of whey that drips from the cloth onto your fridge shelf. (The cloth soaks up whey as it separates from the curds).

Place the container in the refrigerator. The length
of time it should be left in the fridge depends on
personal preference. The minimum time is 24 hours
in my experience. The longer your leave it in the
fridge, the thicker the cream cheese will get. I would not leave it longer than 3 days.
Step 5 Test For Required Consistency

Once your kefir has been in the fridge for the prescribed duration, remove it from the fridge, unwrap the cloth and open the lid.
The whey will have drained out and should be in the bottom of the container. The curd, (the cheese part) will be left on the cloth.
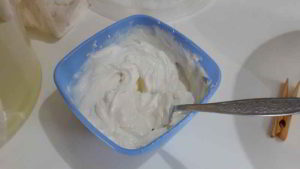
The kefir should now look more like cream cheese and have a similar consistency.
The cream cheese will come away from the cloth easily if you scrape it off with a stainless steel spoon or plastic spatula.

Step 6 Place In Storage Container
Place the cream cheese is a clean plastic bowl and give it a good mixing with a stainless steel spoon (must be stainless steel if it is a metal spoon) or a plastic spatula.

Now comes the part where you can get creative! You can flavour your cream cheese to suit your taste.
Feel free to experiment with flavours and methods of using your healthy, pro-biotic cream cheese.
Some ways I like to flavour / use my cream cheese is as follows:
- Sprinkle in ground sea salt or Himalayan salt, freshly ground black pepper and some chilli flakes for a bit of a bite.
- Salt and pepper as above, mixed herbs, a splash of lemon juice.
- Mix with mayonnaise and chutney to make a great dip
- Use as a healthier substitute in recipes that call for cream cheese.
You are only limited by your imagination in ways you can use your kefir cream cheese – and you can have the satisfaction of knowing it is something you made yourself!
You may also like our post on another fermented product, Kombucha.
Get more posts like this
Subscribe to our mailing list and get interesting homesteading and green living info and updates to your email inbox.
Thank you for subscribing.
Something went wrong.


