Hydroponic Tomatoes: A Guide To Growing Tomatoes Without Soil
I get commissions for purchases made through links in this post. View our Affiliate Disclaimer.
Tomatoes are one of the most popular and versatile crops to grow in a home garden. They can be used for salads, sauces, soups, sandwiches, and more. But what if you don’t have enough space or suitable soil to grow them? Or what if you want to enjoy fresh tomatoes all year round, regardless of the weather or season?
Tomatoes can be grown successfully in hydroponic systems, requiring different considerations from growing them in soil. The chosen hydroponic system must maintain the right conditions to provide the tomatoes with the best growing conditions to promote healthy plants and fruit production.
In this article, we explain how to grow hydroponic tomatoes and the best varieties and systems for hydroponic tomatoes. We also cover some of the common problems and solutions for hydroponic tomato growers.
How To Grow Hydroponic Tomatoes DIY
Hydroponics is a method of growing plants without soil, using a nutrient solution that provides all the essential elements for plant growth.
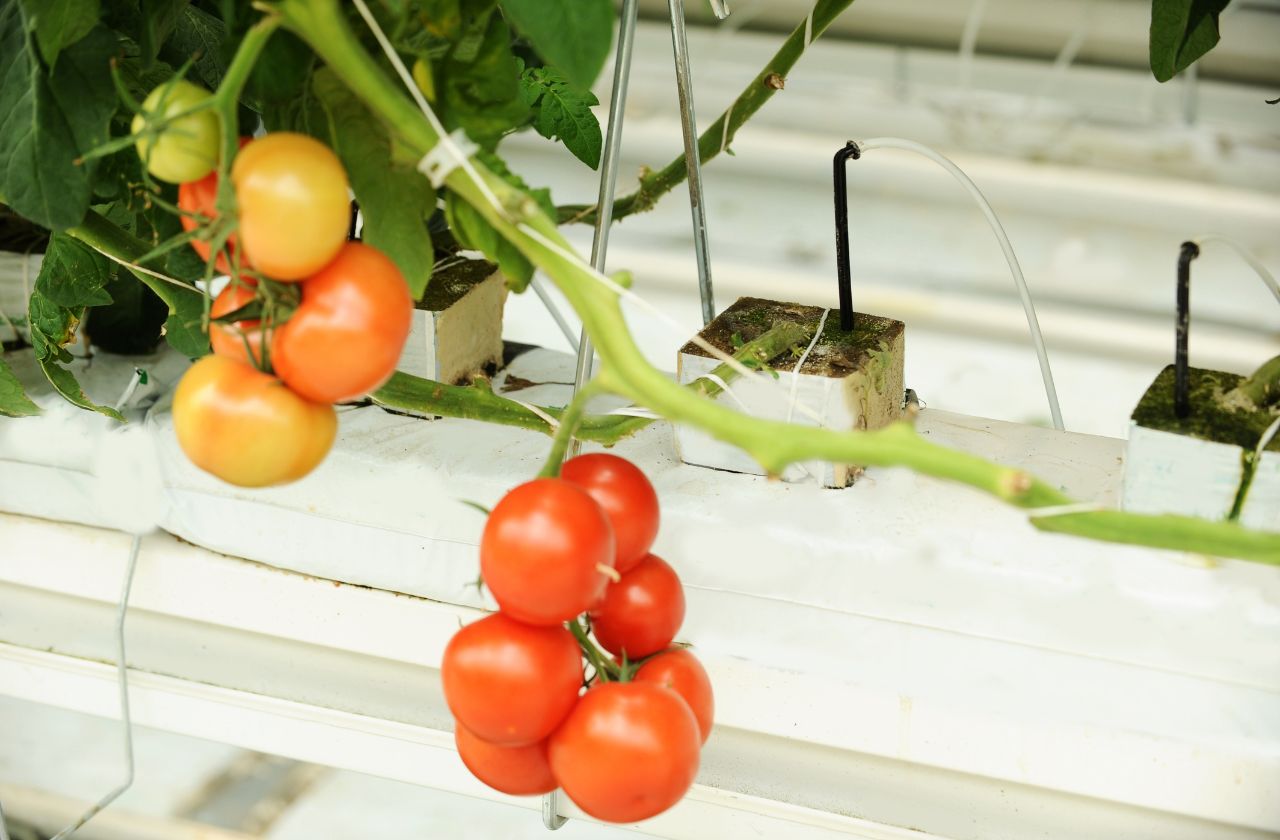
Hydroponic tomatoes are grown in a controlled environment that reduces the risk of pests, diseases, and environmental stress. They also tend to grow faster and produce higher yields than soil-grown tomatoes.
Growing hydroponic tomatoes is completely different from growing tomatoes in soil, but certain considerations must be observed to ensure success.
Start with healthy seeds or seedlings, provide adequate light, water, nutrients, and support, and regularly monitor and maintain your plants. I recommend the following steps and considerations for hydroponic tomato growing.
Step 1: Choose Your Tomato Variety

You can grow any tomato variety hydroponically, but some varieties perform better than others in a hydroponic system.
Generally speaking, indeterminate varieties (those that keep growing and producing until frost) are preferred over determinate varieties (those that stop growing and producing after a certain point) because they can take advantage of the longer growing season and higher yield potential of hydroponics.
Some of the best indeterminate varieties for hydroponic tomatoes are:
- Trust: A beefsteak variety that produces large fruits (9-10 ounces) with a good shelf life. It is resistant to some mold strains, such as Fusarium crown.
- Daniela: Another beefsteak variety that produces smaller fruits (4-5 ounces) that ripen uniformly. It is also resistant to some diseases.
- Moskvich: An heirloom variety that produces large, globe-shaped fruits with a strong flavor and aroma. It is also disease-resistant.
- Thessaloniki: Another heirloom variety that produces large, beefsteak-like fruits with a strong flavor and aroma. It is good for fresh eating or cooking.
If you want to grow plum or cherry tomatoes hydroponically, you can try these varieties.
- San Marzano: A classic plum tomato that produces medium-sized fruits (5 ounces) perfect for sauce or paste making.
- Azafran: A yellow plum tomato that produces small fruits (2 ounces) with a sweet flavor. It is good for vine-ripening or fresh eating.
- Flavorita: A cherry tomato that produces high yields of small fruits (1 ounce) with a sweet flavor. It is disease-resistant and perfect for snacking.
Cherry tomato varieties are often a good choice for beginners due to their robustness and high yield. Once you have gained some experience, you can explore growing some of the more challenging varieties.
Step 2: Choose Your Hydroponic System
Many types of hydroponic systems are available, but not all are suitable for growing tomatoes. Tomatoes are large plants that need a lot of space, support, and nutrient solution. Therefore, you should choose a system that can accommodate these needs.
The ebb and flow system is one of the most common and easy-to-build systems for hydroponic tomatoes.
This system consists of a large plastic container (reservoir) filled with water and nutrient solution, a grow table (tray) filled with a non-soil growing medium (substrate) that supports the plants’ roots, a timer that controls the flooding and draining cycles of the nutrient solution, and a water pump that moves the solution between the reservoir and the tray.
The ebb and flow system works by flooding the tray with nutrient solution periodically (usually every few hours) and then draining it back to the reservoir when it reaches a certain level (usually 2 inches below the top of the tray). This way, the plant’s roots get enough water, nutrients, and oxygen without being submerged or dried out.
Some alternatives to the ebb and flow system are as follows.
- Deep water culture: A simple DWC system that consists of a reservoir filled with nutrient solution and an air pump that provides oxygen to the solution. The plants are suspended in the solution with their roots submerged. This system is good for small plants, such as cherry tomatoes.
- Multi flow: A larger version of the ebb and flow system that relies on gravity to move the nutrient solution between multiple trays. This system can support more plants, but it is more difficult to build and maintain.
- Nutrient film technique: A system that consists of a reservoir filled with nutrient solution, a water pump that circulates the solution through a series of tubes or channels, and a slope that allows the solution to trickle down the tubes or channels. The plants are suspended in the tubes or channels with their roots brushing against the thin film of nutrient solution. This system is more finicky and expensive, but it is preferred by some commercial growers.
Step 3: Start Your Tomato Seeds Or Seedlings
You can start your hydroponic tomatoes from seeds or seedlings. Seeds are cheaper and more readily available, but they take longer to germinate and grow. Seedlings are more expensive and less diverse, but they save you time and hassle.
If you choose to start from seeds, you must germinate them in a special material, such as Rockwool cubes, peat pellets, or coco coir. These materials are sterile, porous, and water-retentive, which are ideal for seed germination.
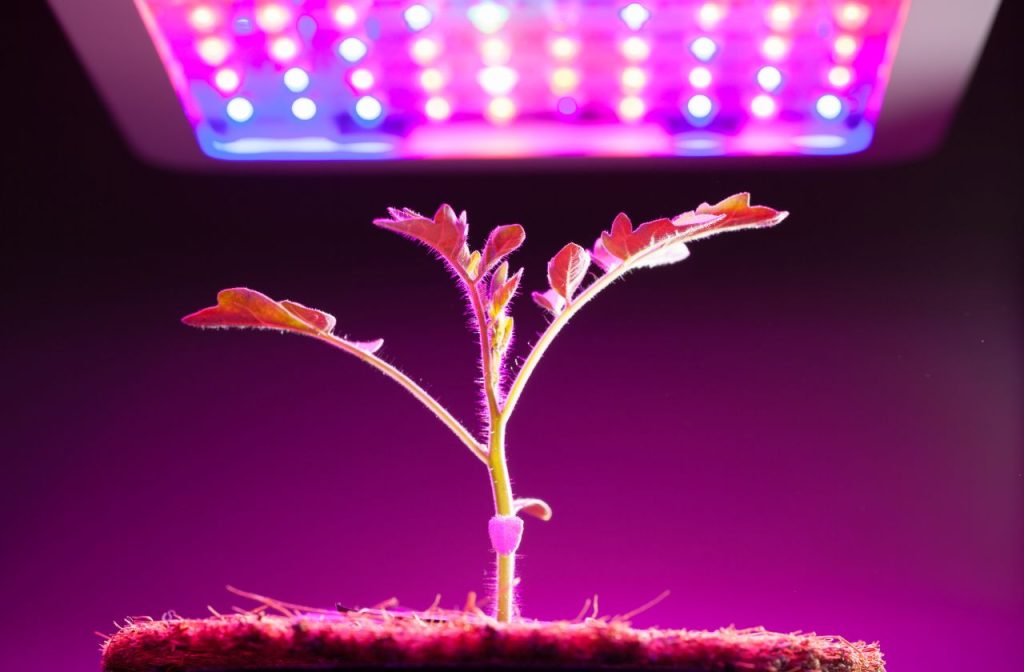
Place the seeds under artificial light, such as fluorescent or LED lamps, once they sprout. Keep the light on for 16-18 hours daily and maintain a temperature of 70-80°F or 21°C to 26.5°C.
If you choose to start from seedlings, buy them from a reputable nursery or garden center. Look for healthy, disease-free plants 6-8 inches tall and have at least two sets of true leaves. Avoid plants with flowers or fruits already, as they will not adapt well to hydroponics.
Step 4: Prepare Your Nutrient Solution

The nutrient solution is the lifeblood of your hydroponic tomatoes. It is important to get the balance right, as this solution will provide all the nutrients your plants need to grow.
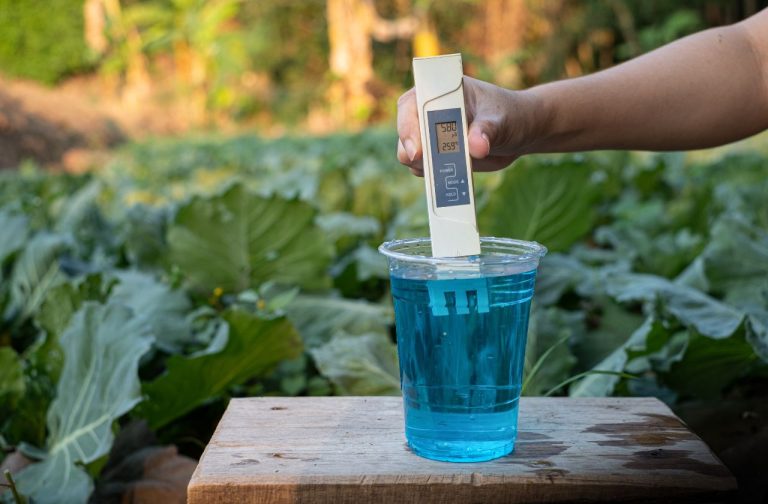
You must carefully monitor the pH for growing hydroponic tomatoes, as the wrong pH can hinder nutrient uptake, affecting the plant’s health and fruiting ability.
The nutrient solution is the liquid that provides all the essential elements for plant growth. It should be balanced, complete, and pH-adjusted. You can buy ready-made hydroponic nutrients from a hydroponics store or online or make your own by following a recipe.
To prepare the nutrient solution, fill the reservoir with water (preferably filtered or distilled) and add the nutrients according to the instructions on the label or recipe.
Measure and adjust the pH of the solution using a pH meter and pH adjusters (such as vinegar or baking soda). The ideal pH range for hydroponic tomatoes is 5.5 to 6.5, but a tighter range of 5.8 to 6.3 is more ideal.
Step 5: Transplant Your Tomato Plants into the Hydroponic System

Once your tomato plants are ready to be transplanted into the hydroponic system, you must prepare the substrate and the nutrient solution.
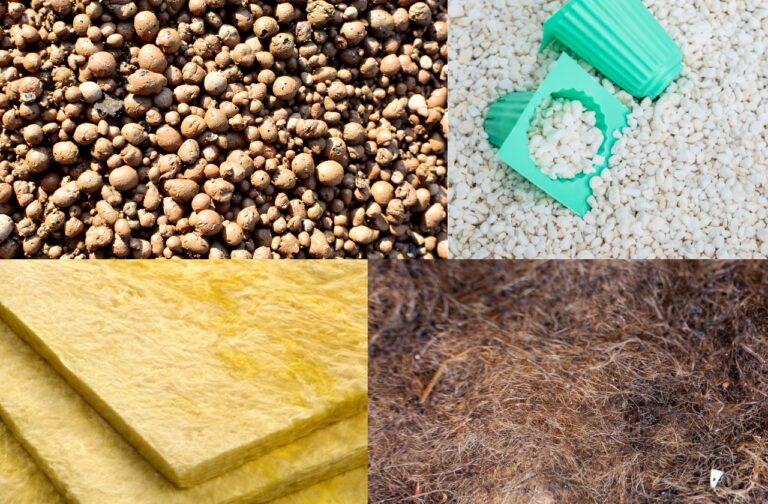
The substrate is the material that fills the tray and supports the plants’ roots. It should be sterile, inert, porous, and water-retentive. Some of the most common substrates for hydroponic tomatoes are:
- Perlite. A lightweight volcanic rock that has excellent drainage and aeration properties. It is cheap and widely available, but it can be dusty and messy.
- Vermiculite. Vermiculite is a mineral that expands when heated and has good water-holding capacity. Vermiculite is often mixed with perlite to create a balanced substrate.
- Rockwool. Rockwool is a fibrous material made from melted basalt rock with high water retention and aeration properties. It is widely used in commercial hydroponics but can be expensive and hard to dispose of.
- Coco coir. A natural fiber made from coconut husks with good water retention and aeration properties. It is renewable and biodegradable, but it can be acidic and salty.
To transplant your tomato plants into the substrate, you will need to make holes in the substrate that are large enough to fit the plant’s roots.
Space the holes about 12-18 inches apart for indeterminate varieties and 8-12 inches apart for determinate varieties. You should also remove any flowers or fruits from the plants before transplanting them.
To transplant your tomato plants into the nutrient solution, place them in pots (such as net pots or plastic cups) with holes at the bottom for drainage. Fill the pots with some substrate (such as perlite or coco coir) to hold the plants in place. Place the pots in the tray so that their bottoms are slightly submerged.
This allows the pots to receive the nutrient solution when the tray is flooded and to drain the excess solution when the tray is drained.
Ensure the pots are not fully submerged or too dry, as this can affect the root health and oxygen availability. Make sure that the pots are not touching each other or the sides of the tray, as this can cause root damage or algae growth. Leave some space between the pots and the tray for air circulation and water movement.
Step 6: Support Your Tomato Plants
Tomato plants are vines that need support to grow upright and prevent their stems from breaking under the weight of their fruits. In a hydroponic system, you will need to provide some form of support for your tomato plants, such as stakes, cages, trellises, or strings.
Stakes are wooden or metal rods that are inserted into the substrate next to the plants. You can tie the plants to the stakes with soft twine or clips as they grow.
Cages are wire or plastic structures surrounding the plants and supporting their branches. You can buy ready-made cages or make your own with wire mesh or PVC pipes.
Trellises are horizontal or vertical frames attached to the wall or ceiling above the plants. You can train the plants to grow along the trellis with twine or clips.
Strings are vertical lines that are attached to the ceiling above the plants. You can hang the plants from the strings with clips or hooks and twist them around the strings as they grow.
Whichever method you choose, you should start supporting your tomato plants when they are about 12 inches tall and continue to do so throughout their growth.
Also, prune your tomato plants regularly to remove any suckers (side shoots) that emerge from the main stem or branches. This will help your plants focus their energy on producing fruits instead of foliage.
Growing hydroponic tomatoes DIY-style can be a rewarding experience. Not only do you get to enjoy the fruits of your labor, but you also gain a deeper understanding of the growing process.
How To Maintain Your Hydroponic Tomatoes
Growing hydroponic tomatoes requires regular monitoring and maintenance to ensure optimal plant health and productivity. Here are some of the tasks you will need to perform daily or weekly.
- Check and adjust the pH and electrical conductivity (EC) of the nutrient solution. The pH measures how acidic or alkaline the solution is, while the EC measures how concentrated the solution is. Both factors affect how well the plants can absorb the nutrients from the solution. You should use a pH meter and an EC meter to measure these values and adjust them accordingly with pH adjusters or more water or nutrients. The ideal pH range for hydroponic tomatoes is 5.8-6.3, while the ideal EC range is 2.0-5.0 mS/cm.
- Check and refill the reservoir with water and nutrient solution. The water level in the reservoir will drop over time due to evaporation and plant uptake. You should check the water level daily and refill it as needed with water and nutrient solution. You should also change the entire nutrient solution every two weeks to prevent nutrient imbalance or salt buildup.
- Check and clean the system components. The system components, such as the pump, tubing, tray, pots, and substrate, can get clogged or dirty over time due to algae growth, root debris, or salt accumulation. Check them weekly and clean them with water and a mild bleach solution if necessary.
- Check and control the growing environment’s temperature, humidity, and ventilation. The growing environment’s temperature, humidity, and ventilation affect how well the plants can perform photosynthesis, transpiration, and respiration. Use a thermometer, a hygrometer, and a fan to measure and control these factors. The ideal temperature range for hydroponic tomatoes is 65-85°F during the day and 55-65°F during the night, while the ideal humidity range is 50-70%. Provide adequate ventilation to prevent mold growth and improve air circulation.
- Check and control the light intensity and duration of the artificial light source. The light intensity and duration of the artificial light source affect how well the plants can produce fruits and flowers. You should use a light meter to measure the light intensity and use a timer to control the light duration. The ideal light intensity for hydroponic tomatoes is 400-600 µmol/m2/s, while the ideal light duration is 16-18 hours a day for vegetative growth and 12-14 hours a day for flowering and fruiting. You should also turn off the lights for 8 hours a day to allow the plants to rest.
How To Troubleshoot Your Hydroponic Tomatoes

Despite your best efforts, you may encounter some problems with your hydroponic tomatoes. Some of the most common problems and their solutions are:
- Nutrient deficiencies. If your plants show signs of nutrient deficiencies, such as yellowing leaves, stunted growth, or poor fruit development, you may need to check and adjust the pH and EC of your nutrient solution. Change your nutrient solution every two weeks to prevent nutrient imbalance or salt buildup.
- Temperature fluctuations. If your plants experience temperature fluctuations, they may become stressed and produce less or lower-quality fruits. Maintain stable temperatures in your growing environment and use a temperature controller if necessary.
- Pests and diseases. If your plants are infested by pests or diseases, such as spider mites, whiteflies, aphids, gray mold, or powdery mildew, you may need to implement an integrated pest management (IPM) plan that includes monitoring, physical barriers, natural predators, and organic pesticides. Remove infected plants and disinfect your system to prevent further spread.
- Light levels. If your plants receive insufficient light, they may grow slowly, weakly, or poorly. You should ensure that your plants receive enough light for their growth stage and use supplemental lighting if natural light levels are insufficient.
- Overcrowding: If your plants are overcrowded, they may compete for nutrients, space, and air circulation. This can lead to reduced growth and increased risk of pests and diseases. Ensure your plants are properly spaced and pruned to prevent overcrowding.
Conclusion
Hydroponic tomatoes are a great way to enjoy fresh tomatoes all year round without soil or space limitations. They can also offer faster growth and higher yields than soil-grown tomatoes. However, hydroponic tomato growing requires careful planning, monitoring, and maintenance to ensure optimal plant health and productivity.
In this article, we have covered how to grow hydroponic tomatoes, what are the best varieties and systems for hydroponic tomatoes, and what are some common problems and solutions for hydroponic tomato growers. We hope this article has helped you with your hydroponic tomato project and inspired you to try this rewarding method of gardening.
Get more posts like this
Subscribe to our mailing list and get interesting homesteading and green living info and updates to your email inbox.
Thank you for subscribing.
Something went wrong.


